

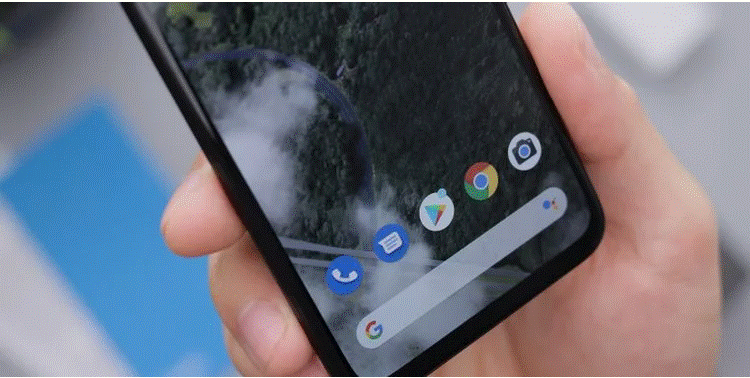
Google’s Phone app is basic, but it has some useful features to make calling easier. The app is free and often comes pre-installed on some devices, including Google’s Pixel line. But you can install it on almost every Android device through the Play Store.
Here are some great tips for using the Google mobile app like a pro. Note that we are referring to the dialer app for making calls, not Google Voice.
To download the application: from here (free).
Read also:
- How to download a copy of all your Twitter data
- How to Clear Other Storage on Your iPhone
- Why your Android phone is overheating (and how to fix it)
- How to factory reset your Galaxy
1. Block numbers
Unwanted calls can be a nuisance. But thanks to a feature in the Google Phone app, you can block a specific number or all calls from unknown callers. To block a phone number from your recent calls, open the Phone app and tap the Recent tab at the bottom.
Next, tap and hold on the number you wish to block. This will open a popup with several options. Tap Block/Report Spam, check Report the call as spam if applicable, and tap Block.
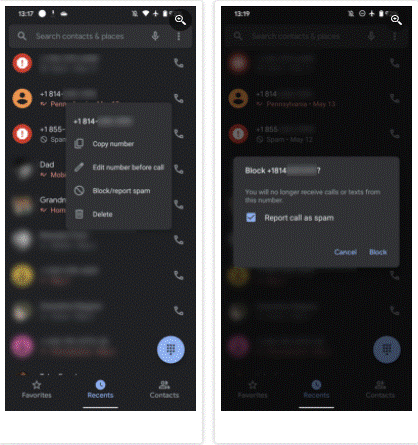
To block calls from unknown callers, tap on the three dots menu at the top right. Next, select Settings from the popup, then choose Blocked numbers. Tap the toggle button next to Unknown. With this option turned on, your phone will block numbers from private callers—but this won’t block all calls from numbers not in your contacts.
You can also use this page to block a specific number that is not available in your recent call history. Click Add Number at the top of the block list, enter the number you want to block, and then hit Block.
2. Customize Quick Replies
Google’s phone app comes with four quick replies to use if you don’t want to answer a call at the moment. But this may not be ideal for you.
You can customize these messages by clicking on the three dots menu at the top right, then choosing Settings. Select Quick Replies from the list.
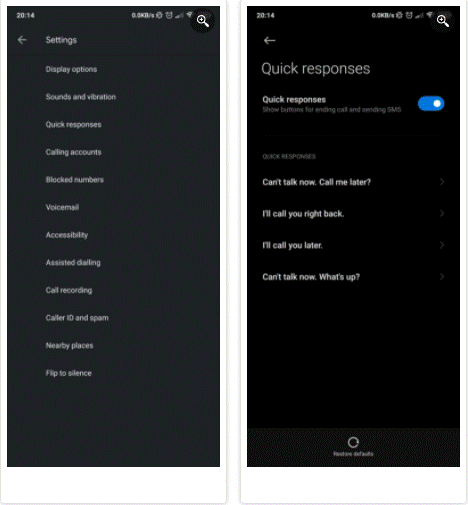
Click on any message and edit it as per your own needs. Press OK when done to save your custom message. As with many Android functions, you may see a different screen than the one listed above, depending on your device manufacturer.
3. Call recording
Call recording can be useful in certain situations. With the native call recording feature available on the Google Phone app, you don’t need a third party app to do it on Android. However, note that there are several limitations to this feature.
First, call recording is available in select regions and on certain devices and carriers. Beware that the app may notify the recipient that the call is being recorded, depending on local laws. Also, your phone must have at least Android 9 to use this feature.
Finally, call recording will not work when creating a conference call, or when the call is muted or put on hold.
There are two call recording options to choose from. You can choose to always record calls from unknown numbers, or only record incoming calls from specific individuals.
To make call recording work automatically, go to the Settings menu in the Phone app and select Call recording. If you don’t see it, it’s not available to you.
Turn on the numbers not in your contacts under Always record to automatically record calls from unsaved contacts. Confirm your choice by pressing Always record from the popup menu.
If you only want to record calls from certain contacts, tap Specific numbers under Always record instead. Next, turn on Always log selected numbers, press the plus sign at the top right, and choose any contact. Finally, tap Always register to confirm. Repeat this process to add as many contacts as you want.
You can also record a call when needed by pressing Record on the Ongoing Call screen.
4. Customize display options
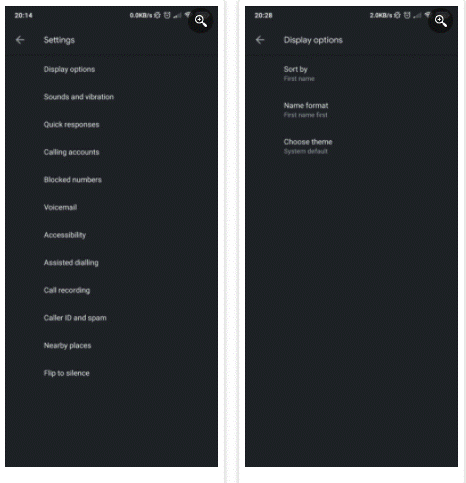
The Google Phone app has two different ways to sort your saved contacts: by first or last name. First name is the default, but you can choose to see your contacts in order of last name.
If you want to change this, launch the Phone app and tap the three-dot menu, select Settings, and choose Display options. Click on Sort by and select your preference. Under the name format, you can also specify how the app displays contacts, with their first or last name highlighted.
5. Automatic answering of calls
The ability to answer calls without lifting a finger is also available on the Google Phone app. However, it is not a universally available feature.
To see if you can use it, go to the Settings page in the Phone app as shown above, and choose Connection Accounts. Next, under the Call settings page, select Auto Reply.
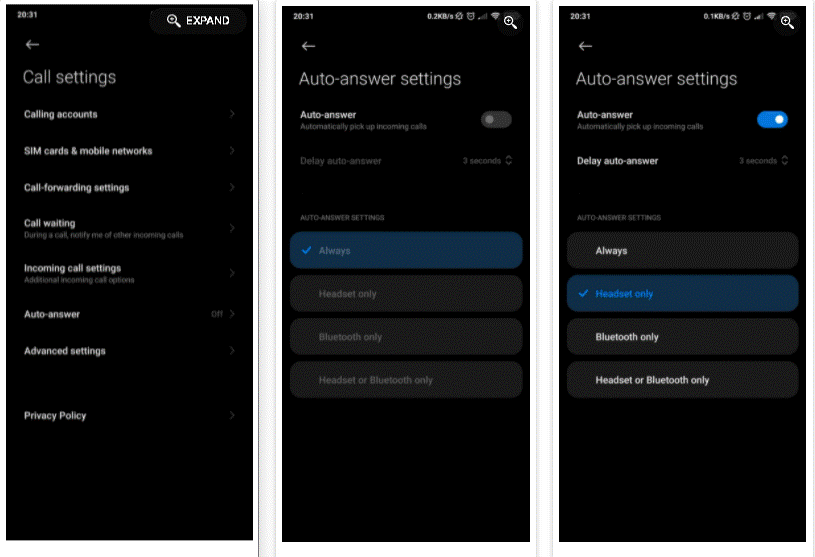
Enable Auto Answer and specify the instances in which your phone should receive incoming calls automatically. Options include always, headset only, bluetooth only, headset or bluetooth only. Again, depending on your device, you may see a different screen here.
6. Customize your favorites
You can also customize your favorites in the phone app. Open the app and tap Favorites at the bottom to open that section—if the app doesn’t take you directly to that section. Add a new contact to your favourites by clicking add from the top right and selecting someone.
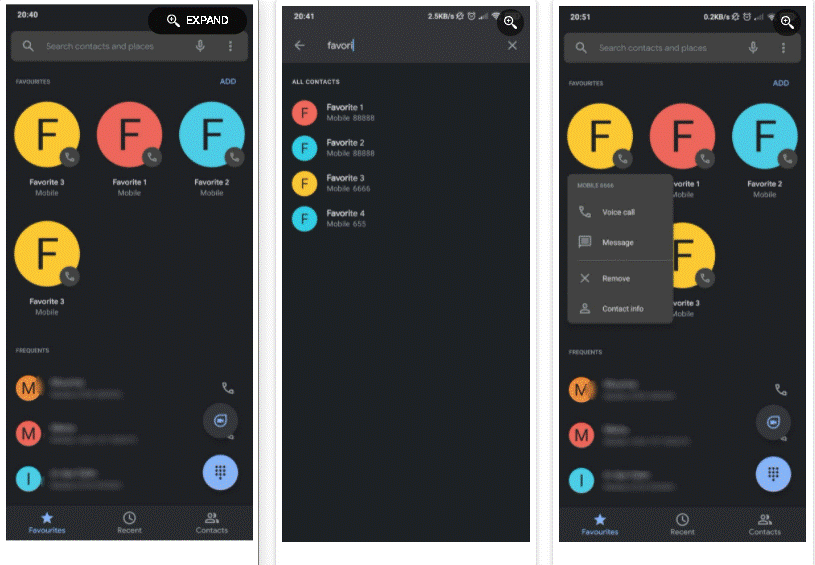
You can also remove an existing favorite by pressing and holding it, then selecting Remove from the popup menu. The app allows you to arrange your favorites the way you want by drag and drop.
7. Find and connect to nearby places directly
This feature uses your location to display information about nearby places. For this reason, you will have to give the mobile app access to your location data.
Go to the Settings page within the phone app, select Nearby places, then enable the Nearby places slider to turn on the feature.

To grant access to the location, tap the location permission slider, then grant it the permissions. If you’re using Android 11 or later, you’ll only see While using the app and only this time options.
You can also enable personalized search results to increase your chances of getting relevant information. You will have to link your Google account and turn on site access, if you haven’t already, to enjoy these features.
8. Check calls and verified calls
Verified calls can tell you why a particular company is calling. Displays the company name and logo and the reason for the contact they gave. If you want Google to show you the caller ID of verified businesses, go to the same settings menu, select Caller ID & Spam, tap Verified calls and link your number.
Meanwhile, you can also have Google Assistant monitor your calls before you pick them up. To do this:
- Go to the Settings menu in the Phone app, then select Spam and Call screen. Make sure Caller ID and Spam are turned on for this feature to work.
- Tap the call screen, then select the callers to view under the unknown call settings.
Call screening is only available in the US, on all Pixel phones, and in Canada on Pixel phones and select Android devices.
Pre-installed mobile apps on Android devices
These are some of the great features that make it worth switching to Google’s mobile app. However, most manufacturers also include pre-installed calling apps. These sometimes offer unique features as well.
Which one you use is up to you; Another benefit of Google’s dialer app is that you can use it on almost all phones.